Cottage style decorating, renovating and entertaining Ideas for indoors and out
  • Design Ideas
  • Entertaining
  • Outdoor/Garden
  • Lifestyle
  • C&B Project House
  • Shopping
  • Brand Ambassador
  • Wish List
  • Ebook
45K
314K
15K
Cottage style decorating, renovating and entertaining Ideas for indoors and out
Cottage style decorating, renovating and entertaining Ideas for indoors and out Cottage style decorating, renovating and entertaining Ideas for indoors and out
  • Design Ideas
  • Entertaining
  • Outdoor/Garden
  • Lifestyle
  • C&B Project House
  • Shopping
  • Brand Ambassador
  • Wish List
  • Ebook
  • Crafts
  • Design Ideas
  • DIY

Fruitful DIYs

  • October 13, 2017
  • Written by Victoria Van Vlear
  • Photography by Henry De Kuyper
Total
8
Shares
1
0
7

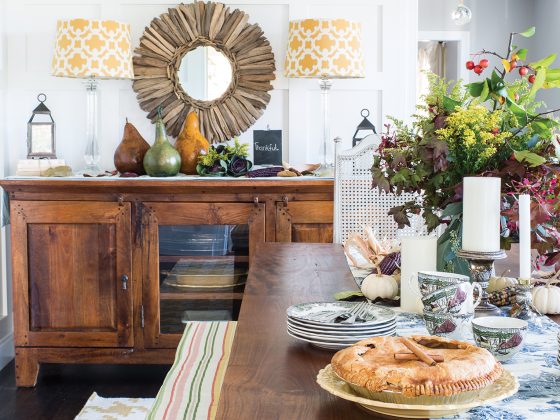
Acorns, pumpkins, squash and cinnamon—autumn is the perfect time to incorporate natural elements into your décor. How about adding some oranges into the mix? Dried slices make a great building material for wreaths, garlands, potpourri or anything else you can think of—and when properly dried, they won’t get moldy or smelly. Simply store them in an airtight container and reuse them next year.


JUST THE ORANGES

WHAT YOU’LL NEED

• 8–9 medium oranges (lemons work too)
• Cutting board
• Sharp knife
• Paper towels
• Baking rack

HOW TO DO IT

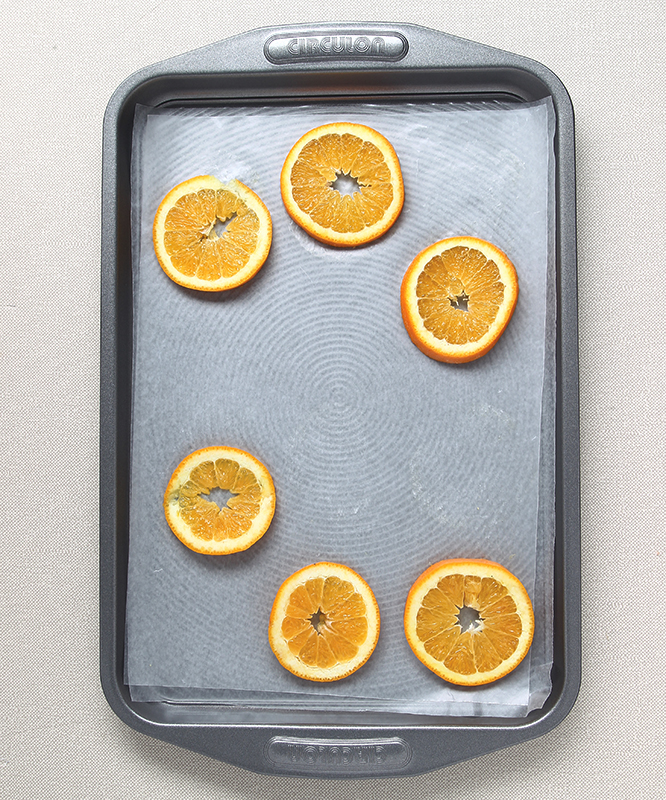
1. Turn on the oven to the lowest temperature. Many ovens have a “warm” setting. If your oven doesn’t have this setting, turn it to the lowest temperature available.

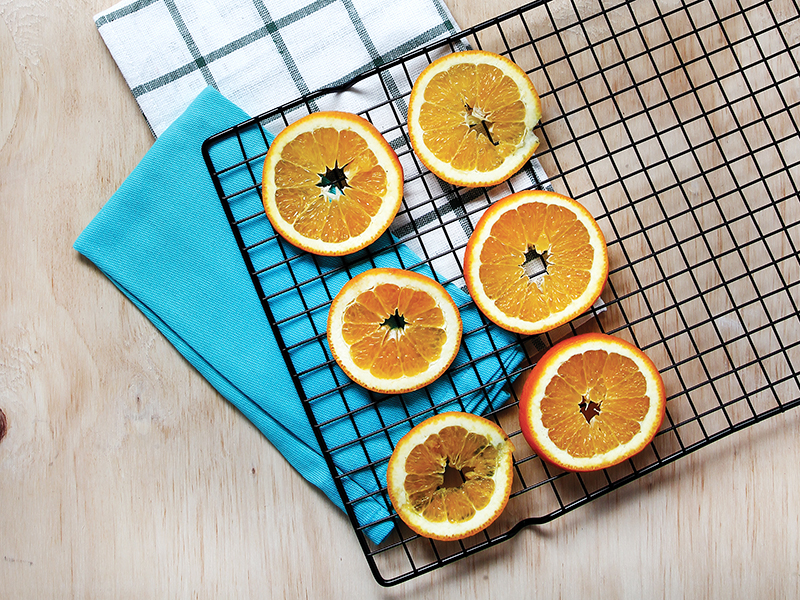
2. Cut the oranges into thin slices. The thinner the slices, the more quickly they’ll dry. You can insert a fork into the end of the orange to protect your fingers from the knife.

3. Pat the slices dry with paper towels; then place the slices on a baking rack to allow air circulation. The slices will dry more quickly if they contain less juice.

4. Bake the slices for 2–3 hours or until they become hard and dry. Baking time will depend on the thickness of the slices, the temperature of the oven and your elevation.

5. Check on the slices every hour, and turn them over to prevent sticking. The finished slices may be a little sticky, but they won’t become moldy. If they’re still slightly malleable, that’s OK too—you’ll be able to form and mold them as needed.

DRIED-ORANGE WREATH

WHAT YOU’LL NEED

• 12” wreath form (preferably Styrofoam)
• Dried-orange slices from 8–9 medium oranges
• Straight pins
• Wide burlap ribbon
• Sprigs of green for accents

HOW TO DO IT

1. Beginning anywhere on the wreath form, pin a single layer of orange slices onto the Styrofoam using the straight pins. Work your way around the form and don’t worry about filling every gap.

2. Once you have the initial layer of slices in place, work your way around the form a second time, pinning on another layer to fill in the gaps where the form peeks through. If you have any slices that are too hard to bend and liable to crack, save those for the second row, when you can pin them on top without having to shape the slices.

3. Tie a bit of burlap ribbon into a bow or knot. Use another straight pin to tack it onto the front of the wreath.

4. Embellish the bow with a few sprigs of green from your garden, a couple of dry twigs or some acorns. You could even add a few pinecones as winter approaches.

Try hanging your dried-orange garland in front of a window. The light will shine through and create a stained glass effect.

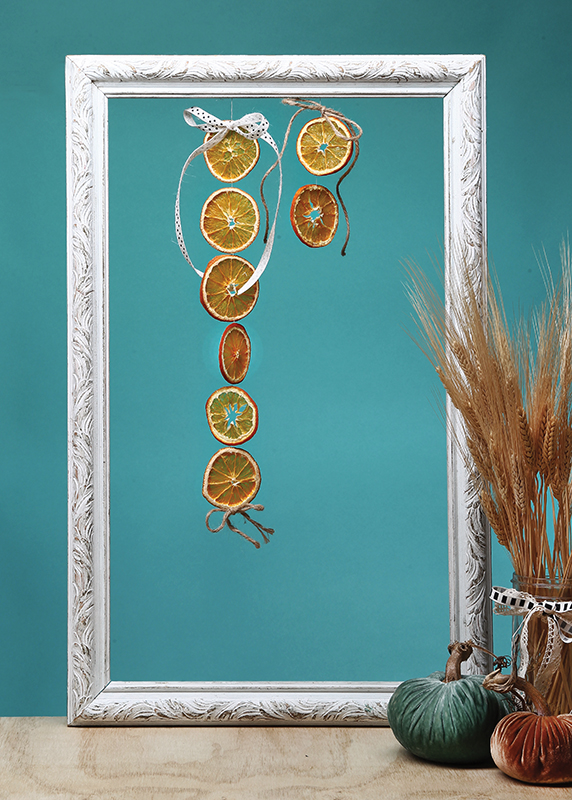
DRIED-ORANGE GARLAND

WHAT YOU’LL NEED

• Dried-orange slices from 1–2 medium oranges
• White or clear thread
• Sewing needle
• Scissors
• Complementary ribbon

HOW TO DO IT

1. Thread the needle; then thread the strand through the end of an orange slice and secure it.

2. Using the needle, connect a second slice to the first. Tie off the thread and snip it with the scissors.

3. Repeat this process with the desired number of slices, connecting each slice with its own strand of thread. This will prevent viewers from seeing the thread run through the middle of the slices.

4. When the garland reaches your desired length, create an extra loop of thread from which to hang the garland; then tie off the thread and snip it.

5. Add any light-weight embellishments, such as ribbon, string or even a bell. Hang the garland and enjoy!

Total
8
Shares
Share 1
Tweet 0
Pin it 7
Related Topics
  • Autumn
  • Crafts
  • DIY
  • Fall
  • fruit
  • oranges
  • wreath
Victoria Van Vlear

Previous Article
  • Design Ideas

House Tour: A Modern Rustic Masterpiece

  • October 9, 2017
  • Written by Jickie Torres and Jenna Dixon
  • Photography by Marian Parsons
  • Styling by Marian Parsons and Kristen Janzcyk
View Post
Next Article
  • Outdoor/Garden
  • Uncategorized

4 Ways to Get That Farmhouse-Cottage Look

  • October 13, 2017
  • Written by Jickie Torres
View Post
You May Also Like
View Post
  • Design Ideas

Jubilee on the Lake

  • Autumn Krause
  • February 24, 2023
View Post
  • Design Ideas
  • Lifestyle

Camp Lucky Dog

  • Autumn Krause
  • February 24, 2023
blue and white stripped bedding on bed with oak headboard with coordinating curtains
View Post
  • Design Ideas
  • Shopping

Your Guide to a Coastal Cool Bedroom with Piper Classics

  • Written by Anya Murphy
  • Photography by Piper Classics
  • February 8, 2023
View Post
  • Design Ideas
  • Shopping

3 Day Blinds’ 3 Window Styling Upgrades

  • Anya Murphy
  • January 17, 2023
A couple plays with two small children with a tent in a playroom.
View Post
  • BEDROOM
  • Design Ideas
  • DIY
  • Renovation
  • Shopping

Lori Beds: Real Wood, Real Sustainability, Real Functionality

  • Written by Anya Murphy
  • Photographs by Lori Beds
  • December 21, 2022
View Post
  • Christmas
  • Decorating
  • Design Ideas
  • Featured
  • Lifestyle

A Hand-Painted Focal Point

  • Written by Marissa Moldoch
  • Photography and Styling by Shelley Donnelly
  • December 12, 2022
View Post
  • Design Ideas
  • KITCHEN

Restoring a Country Cottage Home

  • Kelly McMaster
  • November 18, 2022
View Post
  • Design Ideas
  • Entertaining
  • Lifestyle

Modern Cottage Living

  • Written by Marissa Moldoch
  • Photographed and Styled by Melissa Kalbfleisch
  • October 13, 2022

Leave a Reply

Your email address will not be published. Required fields are marked *


Subscribe to our newsletter

Sign up to receive the best of cottage style directly in your inbox!

  • A Childhood Dream Realized

Subscribe to our newsletter

Sign up to receive the best of cottage style directly in your inbox!

Cottage style decorating, renovating and entertaining Ideas for indoors and out
  • About Us
  • Subscribe
  • Contact Us
  • Terms of Use
  • Privacy Policy
  • Newsletter
  • Do Not Share My Personal Info
Copyright © 2023 Cottages & Bungalows

Input your search keywords and press Enter.

We use cookies to optimise our website and give you the best experience on our website. ACCEPTREAD MORE
X