Cottage style decorating, renovating and entertaining Ideas for indoors and out
  • Design Ideas
  • Entertaining
  • Outdoor/Garden
  • Lifestyle
  • C&B Project House
  • Shopping
  • Brand Ambassador
  • Shop
    • Subscribe
    • Complete Your Collection Offer
    • Single Issues
    • Product Collab
    • Ebook
    • Flea Market Décor
    • Make Your Owan Combo
  • Cottage Destinations
  • Events
45K
314K
19K
Cottage style decorating, renovating and entertaining Ideas for indoors and out
0Login
Cottage style decorating, renovating and entertaining Ideas for indoors and out Cottage style decorating, renovating and entertaining Ideas for indoors and out
  • Design Ideas
  • Entertaining
  • Outdoor/Garden
  • Lifestyle
  • C&B Project House
  • Shopping
  • Brand Ambassador
  • Shop
    • Subscribe
    • Complete Your Collection Offer
    • Single Issues
    • Product Collab
    • Ebook
    • Flea Market Décor
    • Make Your Owan Combo
  • Cottage Destinations
  • Events
0
  • Design Ideas

How to Strip Paint (Before & After Photos)

  • April 21, 2013
  • Written and Photographed by Marian Parsons
Total
0
Shares
0
0
0


beautiful finished product
The beautiful finished product! Learn how to do it here!


CB Dresser - Before
Before

What you’ll need for this DIY project:

  • Water-based gel paint stripper
  • Cling wrap (optional)
  • Chip brush
  • Rubber gloves
  • Eye protection
  • Putty knife
  • Steel wool
  • Clean rag
  • Metal container with lid

How to do it: For this project follow all of the manufacturer’s safety instructions, wear rubber gloves and eye protection, and work in a well-ventilated area.

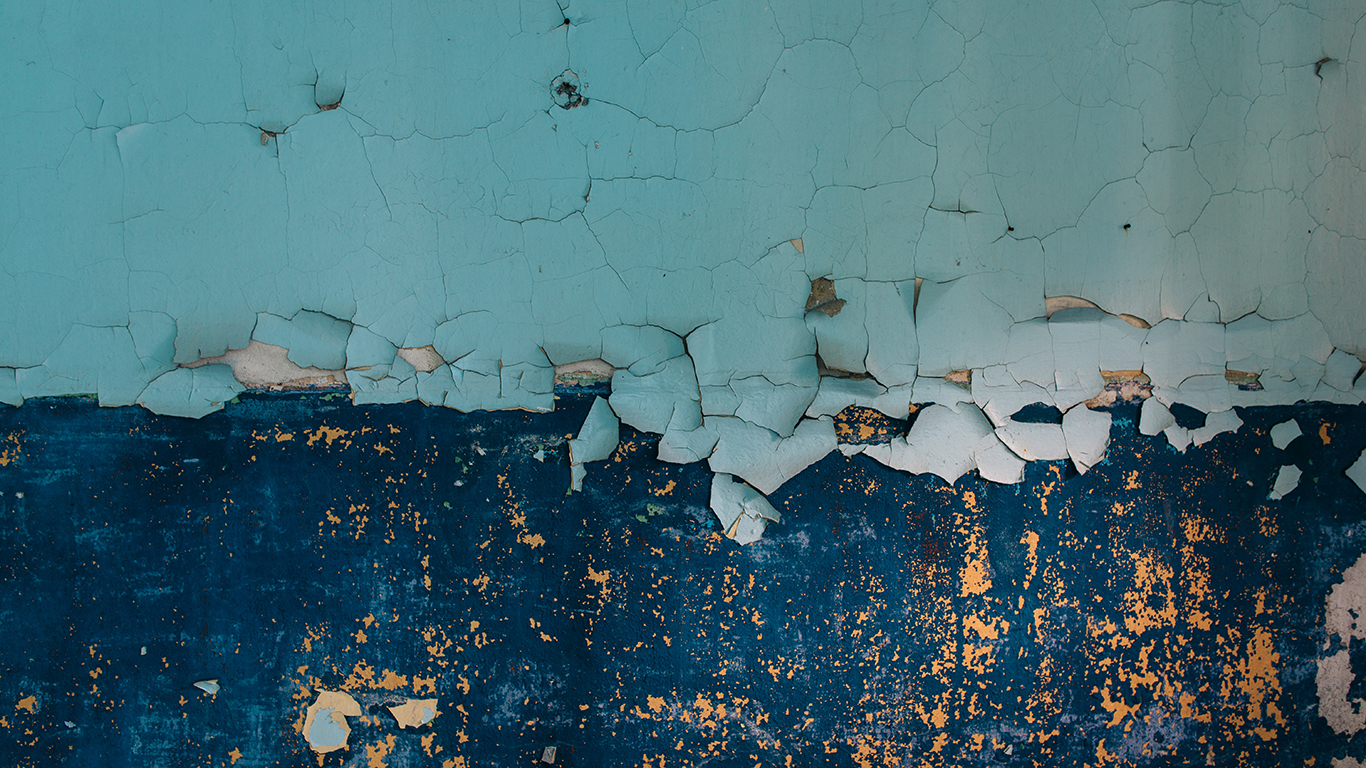
1. Using a natural chip brush, apply water-based gel paint remover liberally to surface. Allow remover to activate and loosen paint before moving to step 2. Consult manufacturer’s directions for exact activation time.

Optional: Cover ­­surface with cling wrap once remover is applied. This will slow drying time and allow remover to loosen several layers of paint in one application.

Natural chip brush
Natural chip brush
Cling wrap
Cling wrap.

2. If used, remove cling wrap. Hold a putty knife at a 45-degree angle to scrape off paint in the direction of the wood grain. Discard removed paint in a clean metal container; a new paint can with lid is ideal.

CB Dresser - Step 2b

3. Use putty-knife edge to gently remove paint from hard-to-reach areas. If paint resists, don’t force it and risk gouging the wood. Apply additional paint remover and repeat above steps until raw wood is exposed and a minimal amount of paint remains.

4. Apply a final thin coat of paint remover to entire work area and gently scrub with medium steel wool until all paint is removed. Steel wool is ideal for removing paint from carved details and edging.

CB Dresser - Step 5

5. Wipe surface with a clean, damp cloth to remove any residual paint stripper. Once dry, the piece is ready for sanding, stain and finish. Discard chip brush, cling wrap, gloves and used steel wool pads in lidded metal container. Follow manufacturer’s instructions for proper disposal.

CB Dresser- Step 6

Paint removers can also be used on varnishes that are crazed, chipped or have been damaged and discolored by moisture. Once removed, a few coats of paste wax will bring luster and durability to any wood.

Total
0
Shares
Share 0
Tweet 0
Pin it 0
Related Topics
  • DIY
  • Paint
  • Paint stripper
  • repurpose
  • upcycle
Cottages & Bungalows

Previous Article
  • Outdoor/Garden

10 Ways to Amp Up Curb Appeal

  • April 19, 2013
  • Written and photographed by Tom Kelly
View Post
Next Article
  • Lifestyle

Green Luxury Homes

  • April 24, 2013
  • Written by Jacqueline deMontravel
  • Photography by Augusta Quirk
View Post
You May Also Like
View Post
  • Design Ideas
  • Featured

Calm, Cool & Collected

  • Written by Meryl Schoenbaum
  • Photography by Niamh Barry
  • Designed by Olivia Botrie, Dart Studio
  • January 28, 2026
View Post
  • Design Ideas
  • Featured

Nostalgic Cottage Style

  • Written by Meryl Schoenbaum
  • Photographed by Nicole Schmiedl
  • Design by Jess Landis, Studio JL Design
  • January 12, 2026
View Post
  • Design Ideas
  • Featured

A Cottage Classic

  • WRITTEN AND STYLED by Charlotte Safavi
  • PHOTOGRAPHED by Robert Radifera for Stylish Productions
  • January 12, 2026
View Post
  • Design Ideas
  • Featured

Old Cottage Comfort

  • Written by Meryl Schoenbaum
  • Photography by Ellen Renee Photography
  • January 12, 2026
wreath on the corner of fence with view to exterior of Pantry Hill dusted in snow
View Post
  • Christmas
  • Design Ideas

A Pantry Hill Christmas in the Country

  • Written by Autumn Krause
  • Photography by Darien Rozell
  • December 22, 2025
View Post
  • Design Ideas
  • Lifestyle

   A Cozy Home for Eleanor  

  • Written by KELLY MCMASTER
  • Photography by HEIDI SAMIA
  • October 2, 2025
View Post
  • Design Ideas
  • KITCHEN

Mixing in Fresh Ingredients

  • Written by Laura shimko
  • Photography by Abigail Jackson
  • Design by Lauren Branch, Kéfi Home Interiors
  • October 2, 2025
View Post
  • Design Ideas

Keeping it Classic

  • Written by LAURA SHIMKO
  • Photography by STACY ZARIN-GOLDBERG
  • Design by GTM ARCHITECTS
  • September 24, 2025
  • Author Bio
Cottages & Bungalows

Leave a Reply Cancel reply

Your email address will not be published. Required fields are marked *

CAPTCHA Image


Subscribe to our newsletter

Sign-up to receive the best of cottage style directly in your inbox!
  • Calm, Cool & Collected

Subscribe to our newsletter

Sign up to receive the best of cottage style directly in your inbox!

Cottage style decorating, renovating and entertaining Ideas for indoors and out
  • About Us
  • Subscribe
  • Contact Us
  • Terms of Use
  • Privacy Policy
  • FAQ
  • Newsletter
  • Do Not Share My Personal Info
Copyright © 2026 Cottages & Bungalows

Input your search keywords and press Enter.

We use cookies to optimise our website and give you the best experience on our website. ACCEPTREAD MORE
X
latest issue