Login

Not a member? Register

Lost your password?

Register

Your personal data will be used to support your experience throughout this website, to manage access to your account, and for other purposes described in our privacy policy.

Already a member? Login

Cottage style decorating, renovating and entertaining Ideas for indoors and out
  • Design Ideas
  • Entertaining
  • Outdoor/Garden
  • Lifestyle
  • C&B Project House
  • Shopping
  • Brand Ambassador
  • Wish List
  • Ebook
  • Shop
    • Subscribe
    • Single Issues
    • Product Collab
→ Our New 2024 Brand Ambassador Is… ←
45K
314K
17K
Cottage style decorating, renovating and entertaining Ideas for indoors and out
0Login
Cottage style decorating, renovating and entertaining Ideas for indoors and out Cottage style decorating, renovating and entertaining Ideas for indoors and out
  • Design Ideas
  • Entertaining
  • Outdoor/Garden
  • Lifestyle
  • C&B Project House
  • Shopping
  • Brand Ambassador
  • Wish List
  • Ebook
  • Shop
    • Subscribe
    • Single Issues
    • Product Collab
0
Shadow Box Installed
  • Design Ideas

Turn a Flea-Market Frame into a Shadowbox

  • July 24, 2017
  • Written and photographed by Marian Parsons
Total
2
Shares
0
0
2

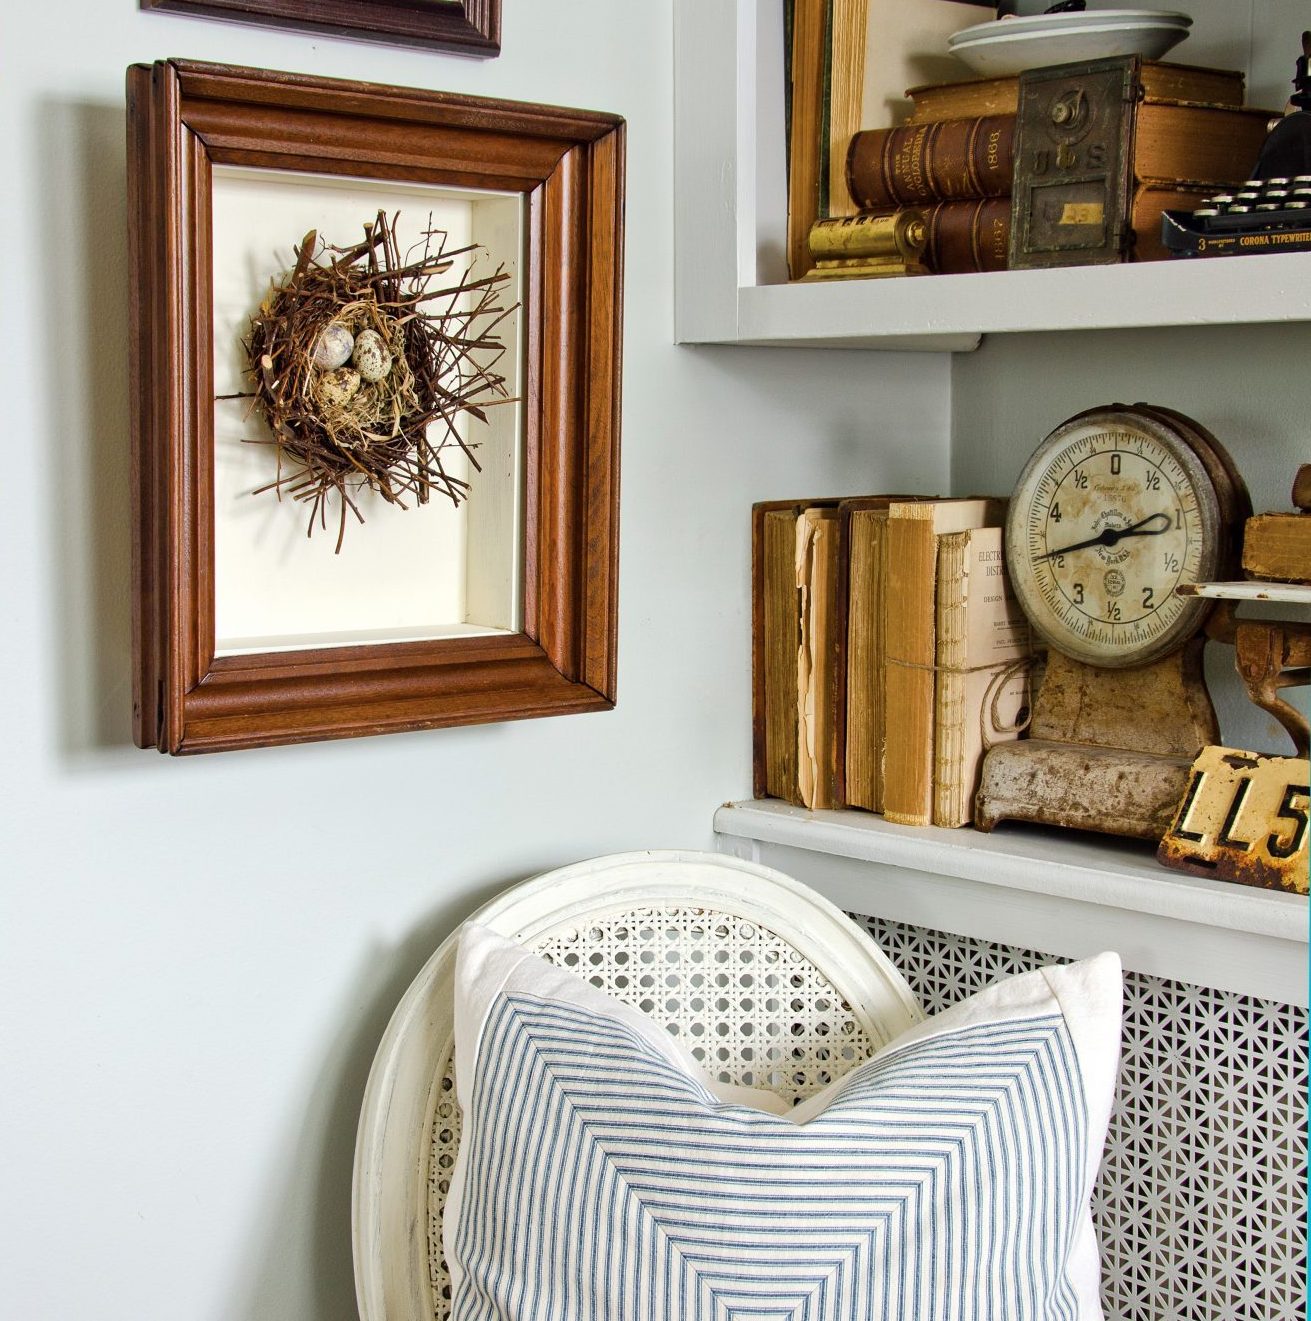
Frames of all styles and sizes are readily available at flea markets, yard sales and thrift stores. Use these quick and easy steps to make a unique shadowbox. Fill it with seashells, a nest, baby shoes or a pretty plate—almost any three-dimensional object can become artwork when placed in a shadowbox.

What you’ll need:

Wood frame (The one used for this project has a 9¼- x 11¼-inch opening.)
Tape measure
½-inch plywood, MDF or wood scraps cut to:
One 10½ x 12½-inch sheet for the back
Two 12½ x 2-inch strips for the sides
Two 9½ x 2-inch strips for the top and bottom
Four 9 x ¾-inch pieces to secure box to frame
Brad nailer and ¾-inch brads (or hammer and small nails)
Primer and paint
2½-inch sash paint brush
Hardware to hang shadowbox
Drill (optional, depending on hardware used)

How to do it:

Shadow box Step 1

1. Cut pieces of scrap wood with a table saw or have them cut at a hardware store. Adjust the dimensions of the wood to fit your frame, if necessary. Place one of the 12 ½-inch side pieces of the shadowbox on its side and position the back of the shadowbox on top. Nail into place with a brad nailer or hammer and small nails. Repeat this process with the three remaining sides until the entire box is assembled and secured with brads.

Shadow Box Step 2

2. Flip the box over so the recess is facing up. Position one of the 9 x ¾-inch pieces of wood so it is flush with the top edge of the box and centered from side to side. Secure from the inside of the box with brads. Repeat on the three remaining sides.

Shadow Box Step 3

3. Prime and paint the interior of the shadowbox in the desired color and finish. Since the shadowbox will protrude from the wall a couple of inches, you can paint or stain the exterior of the shadowbox to blend with the wall or the frame. The interior of the shadowbox can be painted in whatever finish will best showcase the item. Lining the box with fabric or pretty papers can add pattern and texture behind a simple object like a white starfish. As paint is drying, remove hanging hardware and glass from frame.

Shadow Box Step 4

4. Place the frame face down on the work surface. Place the shadowbox on top with the recess facing down. Line up with the opening of the frame and nail into place through 9 x ¾-inch pieces of wood directly into frame. Repeat on the remaining three sides until the shadowbox is securely attached to the frame. Install D-rings or other hardware for picture hanging on the backside of the shadowbox. You can even reuse the hardware that came with the frame. Use glue, nails, tacks or even sticky-back hook-and-loop tape to secure your item in the shadowbox.

Total
2
Shares
Share 0
Tweet 0
Pin it 2
Related Topics
  • craft
  • how to
  • Picture Frame
  • Shadow Box
Cottages & Bungalows

Previous Article
  • Lifestyle

A Guide to Collecting Vintage Souvenir Pillows

  • July 24, 2017
  • Written by Meryl Schoenbaum
View Post
Next Article
Yellow Porch
  • Lifestyle

Why We Love Pocket Neighborhoods

  • July 26, 2017
  • Written by Jennifer Milas & Jickie Torres
  • Photographed by Ross Chapin
View Post
You May Also Like
View Post
  • Decorating
  • Design Ideas
  • Lifestyle

Timeless Designs: The Legacy of Laura Ashley

  • Written by Morgan Anderson
  • September 12, 2023
Retro kitchen with yellow tile and stove and black accents.
View Post
  • Design Ideas
  • KITCHEN
  • Shopping

15 Retro Kitchen Appliances You’ll Love

  • Written by Jickie Torres
  • August 16, 2023
View Post
  • Decorating
  • Design Ideas
  • Outdoor/Garden

Bright and Blissful Décor: Biophilic Design

  • by Morgan Anderson
  • August 15, 2023
View Post
  • Decorating
  • Design Ideas

Pink in Your Decor: Barbiecore

  • by Morgan Anderson
  • July 26, 2023
Front porch featuring a table, rocking chair, pillow, buffet table, mirror, and flowers
View Post
  • Design Ideas
  • Lifestyle

A Cottage of Many Colors

  • Written by Meryl Schoenbaum
  • Photography and Styling by Kimberly McCole
  • July 11, 2023
View Post
  • Design Ideas

How to Prep Your Home for Summer Houseguests

  • Written by Kathryn Drury Wagner
  • July 10, 2023
View Post
  • Design Ideas
  • Outdoor/Garden

Excellent Exteriors

  • Kelly McMaster
  • July 8, 2023
View Post
  • Design Ideas
  • DIY
  • Shopping

Add Character to Your Home with ARTO Tile

  • by Rabekah Henderson
  • June 27, 2023

Leave a Reply

Your email address will not be published. Required fields are marked *


Subscribe to our newsletter

Sign-up to receive the best of cottage style directly in your inbox!
  • Timeless Designs: The Legacy of Laura Ashley

Subscribe to our newsletter

Sign up to receive the best of cottage style directly in your inbox!

Cottage style decorating, renovating and entertaining Ideas for indoors and out
  • About Us
  • Subscribe
  • Contact Us
  • Terms of Use
  • Privacy Policy
  • FAQ
  • Newsletter
  • Do Not Share My Personal Info
Copyright © 2023 Cottages & Bungalows

Input your search keywords and press Enter.

We use cookies to optimise our website and give you the best experience on our website. ACCEPTREAD MORE
X