Cottage style decorating, renovating and entertaining Ideas for indoors and out
  • Design Ideas
  • Entertaining
  • Outdoor/Garden
  • Lifestyle
  • C&B Project House
  • Shopping
  • Brand Ambassador
  • Shop
    • Subscribe
    • Single Issues
    • Product Collab
    • Ebook
  • Cottage Destinations
  • Events
Buy 1 Ticket, Get 1 Free for our Project House Austin Home Tour!
45K
314K
19K
Cottage style decorating, renovating and entertaining Ideas for indoors and out
0Login
Cottage style decorating, renovating and entertaining Ideas for indoors and out Cottage style decorating, renovating and entertaining Ideas for indoors and out
  • Design Ideas
  • Entertaining
  • Outdoor/Garden
  • Lifestyle
  • C&B Project House
  • Shopping
  • Brand Ambassador
  • Shop
    • Subscribe
    • Single Issues
    • Product Collab
    • Ebook
  • Cottage Destinations
  • Events
0
Cement Pumpkin Bowl with Autumn Flower Arrangement
  • Crafts

DIY Cement Pumpkin Bowl

  • October 25, 2024
  • Written and photographed by Toni Marianna
Total
17
Shares
0
0
17
Cement pumpkin bowl sits on a wood table, filled with flowers and surrounded by vintage candles.
The rustic cement pumpkin beautifully complements the natural grains of the wood table as a stunning centerpiece.

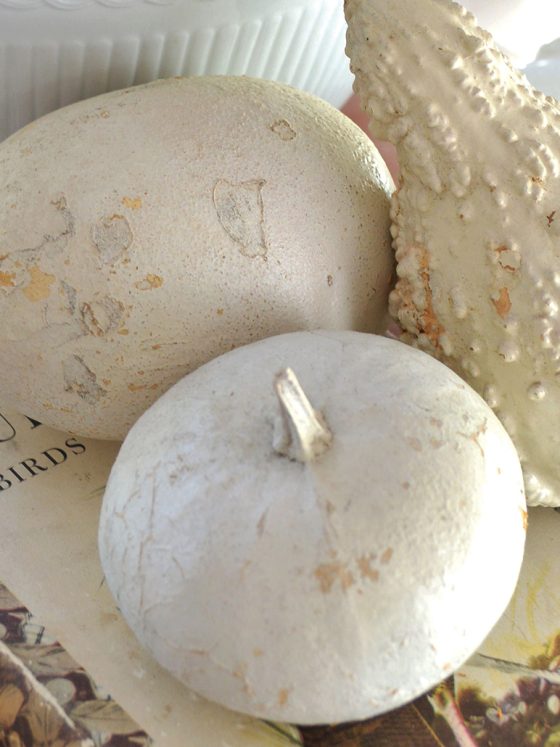
Toni Mogensen was a previous Brand Ambassador for Cottages & Bungalows, and this time of year, we thought we’d re-share her fantastic DIY tutorial for a pumpkin-shaped bowl made of concrete.

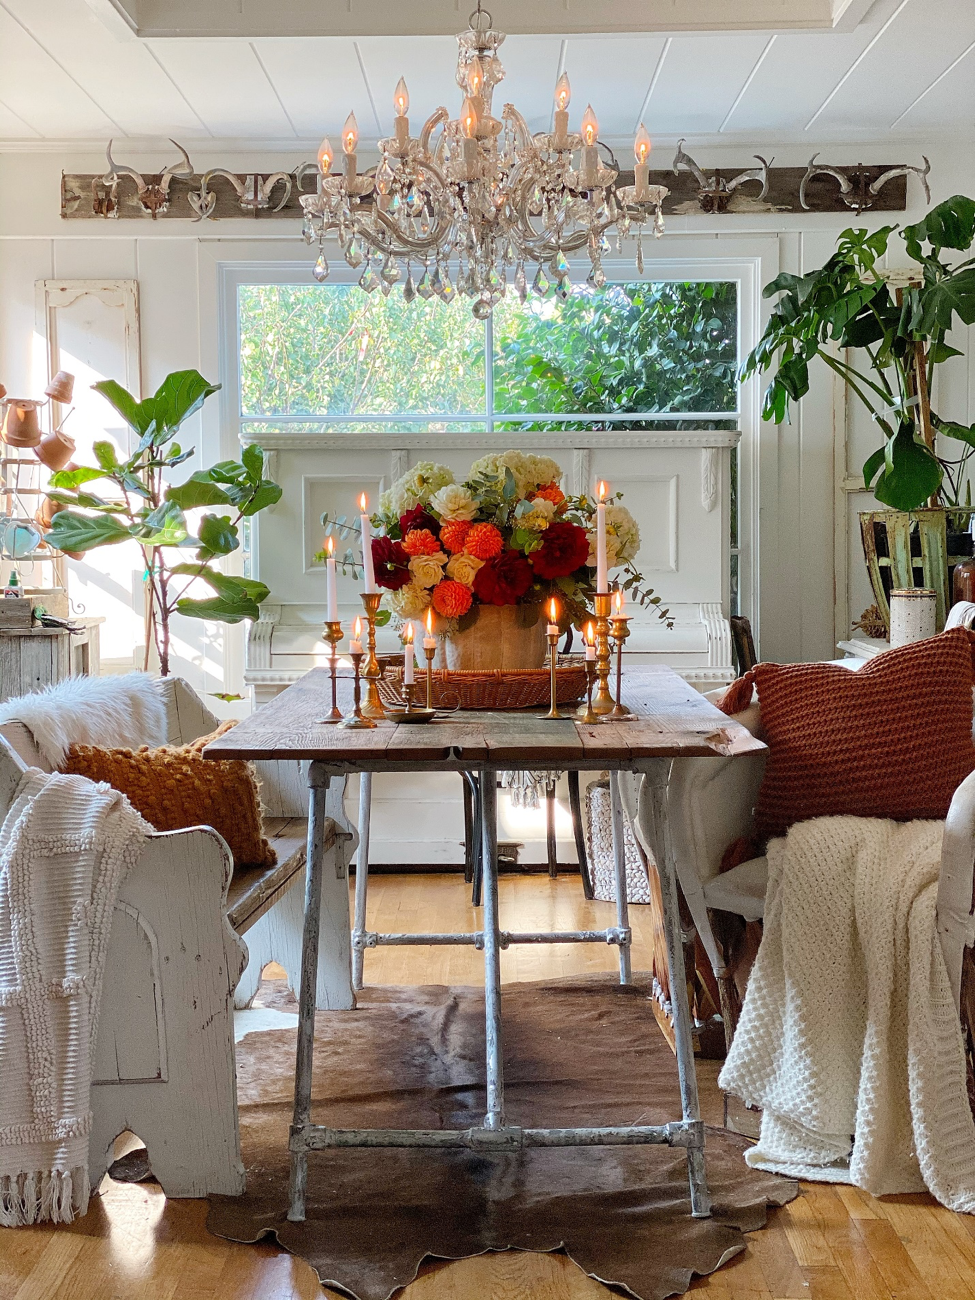
I love fall, I love pumpkins and I love flowers so what better way to kick off the season than to create a fabulous cement pumpkin bowl. The bowl can be used as a vessel for fall foliage, flowers or other items to celebrate the season. In this simple DIY, I will show you how to create a centerpiece that is inexpensive, show stopping and that you can make with just a few supplies and minimal time and effort. I only wish it smelled like pumpkin spice!

Supplies and Tools:

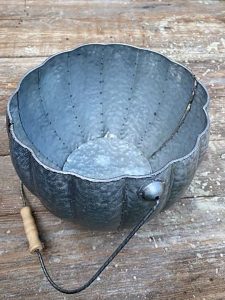
  • Hollow pumpkin mold (can be plastic, metal or resin)
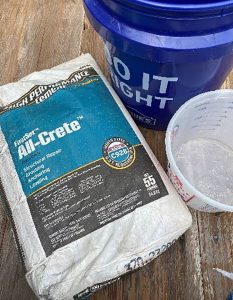
  • Quick setting cement such as All-Crete
  • Small plastic cup, bowl or bucket
  • Water
  • Lubricant like silicone or cooking oil
  • Masking tape
  • 5-gallon bucket
  • Corded drill with mixing attachment or mixing spoon
  • Scissors, tin snips or grinder

Metal pumpkin-shaped bucket.Cement mixture and two buckets needed to create the cement pumpkin bowl.

DIY Cement Pumpkin Tutorial

Metal pumpkin-shaped bucket is cut in half.

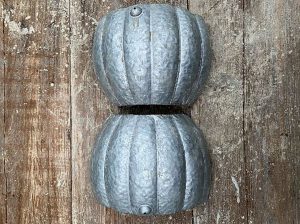
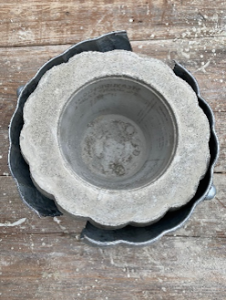
Step 1: Cut pumpkin mold in half.

The first step is to cut your pumpkin mold into two equal pieces, vertically from top to bottom. If you are using a thin plastic pumpkin you should be able to cut it with scissors or shears. If your pumpkin is metal or resin, you will most like need a grinder with a cutoff wheel. This will enable you to remove the mold easily when the cement has cured as the top of the mold is narrower than the middle, unlike a mold such as a bucket or bowl with an opening the same size or larger than the middle.

The metal pumpkin bucket is made into a cast by being split in half and taped back together for easy removal.

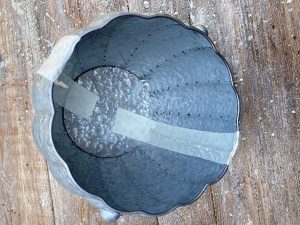
Step 2: Tape pumpkin back together.

You will now need to tape the pumpkin back together, taking care to align the cut edges. Tear off a length of masking tape to cover the edges and while holding the pumpkin together, place the tape over the cut seam on the outside. In addition, if you are using a large mold you can encircle the pumpkin with rope, wire or more tape.
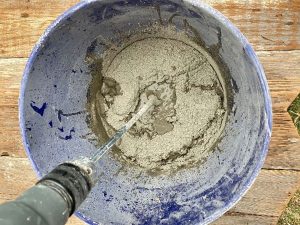
Cement for cement pumpkin bowl is mixed in a separate bucket.

Step 3: Mix cement.

Estimate the amount of dry concrete you will need to fill the pumpkin approximately two-thirds up the side of the pumpkin. Mix according to directions on the bag, adding water first to your mixing bucket and then the cement. Add more water or cement to reach a cake batter consistency. A corded drill with cement mixing attachment will make it easier to achieve a smooth consistency free from lumps.

Cement is poured into the cement pumpkin bowl cast.Bucket is placed inside the pumpkin mold to create a hollow middle.

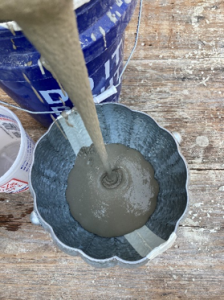
Step 4: Pour cement into mold.

Spray the inside of your mold and the vessel you will place in the wet cement to make the hole with which you will use for the “vase,” with lubricant such as silicone or cooking oil. Pour the cement into the mold until two-thirds full, place the interior vessel into the cement and push down until only one inch is above the lip of the pumpkin mold. Add or remove cement to bring it level with the top of the mold.

Bucket is pressed into the cement pumpkin filling to create a hollow middle where flowers can be put once dry.

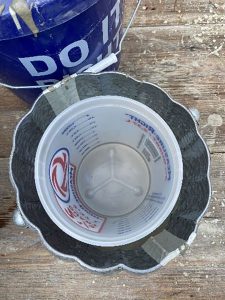
Hold interior vessel in place until cement reaches a firm plastic stage and begins to heat up. Release the interior vessel when it no longer moves. The cement will begin to harden from the bottom of the mold and will “grab” the bottom of the interior vessel.

Hollow cement pumpkin bowl is ready to be taken out of the mold.Hollow cement pumpkin is taken out of the mold in one piece.

Step 5: Let cement fully cure and remove pumpkin mold.

Cement cures by chemical reaction and will heat up. Quick drying cement has an additive that speeds the curing process even more. During this time, you will notice the outside of the mold becomes very hot, well over 100 degrees Fahrenheit. It is not hot enough to burn you but will create enough heat that you cannot keep your hand on the mold for very long.

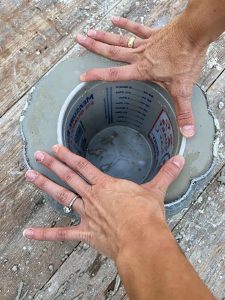
Once the heat dissipates and you can no longer scratch the top surface of the cement your mold will be ready to be removed. Remove the outer tape and gently pry the pumpkin mold apart. You can then remove the interior vessel as well.

*Pro Tip: Condensation from steam will form between the mold and cement from the heat and water, aiding in mold removal. Do not remove mold or interior vessel until the cement starts to cool down and condensation is formed.
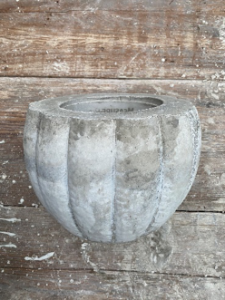
Cement pumpkin bowl rests on top of a vintage wood table, completed with autumn decor.
Paired with chipped-to-perfection vintage seating, this DIY cement pumpkin bowl creates an unforgettable centerpiece.

Step 6: Decorate

Your cement pumpkin is now complete and ready to decorate with! If you will be using cut flowers, place a vase or jar inside the hole to hold the water. Hardened cement is porous and while water will not damage the cement, it will pass through it and leave water marks on your furniture. You can also paint your cement pumpkin if you do not like the natural gray cement color.

Toni shares all her lovely home decor ideas and DIY projects on Instagram as @toni_marianna.

If you love this cement pumpkin bowl DIY, check out DIY Silhouette Painted Pumpkins and Halloween porch DIYs. 

Of course, don’t forget to follow us on Instagram, Facebook and Pinterest to get your daily dose of cottage inspiration! 

Total
17
Shares
Share 0
Tweet 0
Pin it 17
Related Topics
  • Autumn
  • craft
  • DIY
  • Halloween Decor
  • Pumpkin
Toni Marianna

Previous Article
fall decorating with vintage pitcher and furniture along with pumpkins and fall flowers
  • Decorating

Fall Decorating Ideas with a Vintage Twist

  • October 22, 2024
  • Written by Jickie Torres
  • Photographed and styled by Kay Ellen Hammar
View Post
Next Article
spooky and sophisticated Halloween dinner party tablescape with skeleton wearing black detailed shawl and witches hat
  • Entertaining

Set the Table for a Spooky and Sophisticated Halloween

  • October 26, 2024
  • Written by Michellee Black
  • Photography by Bret Gum
  • Styled by Michellee Black
View Post
You May Also Like
Halloween countdown calendar
View Post
  • Crafts

Make a Halloween Countdown Calendar

  • Written by Jickie Torres
  • Photography by Jickie Torres
  • October 19, 2024
Fall wreath with metallic copper patina
View Post
  • Crafts

How to Make Your Own Copper Patina Fall Wreath

  • Written by Kris Christensen
  • Photography by Chad Mellon
  • October 11, 2024
White, dried pumpkins and gourds displayed as home decor.
View Post
  • Crafts
  • Design Ideas

How to Dry Pumpkins and Gourds

  • Written and Photographed by Melinda Graham
  • August 29, 2024
strawberry plant
View Post
  • Crafts
  • Entertaining

Son-Sational Strawberry Roses

  • Written by AMBER LYON FERGUSON
  • Photograph by AMBER LYON FERGUSON
  • STYLED by LIAM FERGUSON
  • February 11, 2024
View Post
  • Crafts
  • Design Ideas

To Dye For

  • Written by JICKIE TORRES
  • Photography by TIME INC. UK LTD.
  • Styling by MICHELA COLLINS
  • July 27, 2021
Mini stocking advent calendar garland
View Post
  • Crafts

How to Make a Mini Stocking Christmas Advent Garland

  • Written and Crafted by Kris Christensen
  • Photography by Bret Gum
  • Styled by Kris Christensen, Donna Runyan, and Lauren Hofer
  • November 4, 2020
Homemade "germ" art with various colored cups of paint and a straw.
View Post
  • Crafts
  • Lifestyle

Coronavirus with Kids: How to Create While Cooped Up

  • Written by Molly Snelson
  • March 27, 2020
Overhead shot of Valentine's Day themed felt ornaments in the shapes of X's O's and hearts.
View Post
  • Crafts
  • Lifestyle

Handmade Valentine’s Crafts

  • Written by MOLLY SNELSON
  • February 8, 2020
  • Author Bio
Toni Marianna

Kris is the former senior digital brand manager for American Farmhouse Style. If she’s not typing away furiously at her laptop, you can usually find her at a flea market or deep in a renovation project on her 100 year old home.

Leave a Reply Cancel reply

Your email address will not be published. Required fields are marked *

CAPTCHA Image


Subscribe to our newsletter

Sign-up to receive the best of cottage style directly in your inbox!
  • gallery wall of framed black and white and botanical art
    Make Your Home Meaningful

Subscribe to our newsletter

Sign up to receive the best of cottage style directly in your inbox!

Cottage style decorating, renovating and entertaining Ideas for indoors and out
  • About Us
  • Subscribe
  • Contact Us
  • Terms of Use
  • Privacy Policy
  • FAQ
  • Newsletter
  • Do Not Share My Personal Info
Copyright © 2025 Cottages & Bungalows

Input your search keywords and press Enter.

Card image cap
We use cookies to optimise our website and give you the best experience on our website. ACCEPTREAD MORE
X