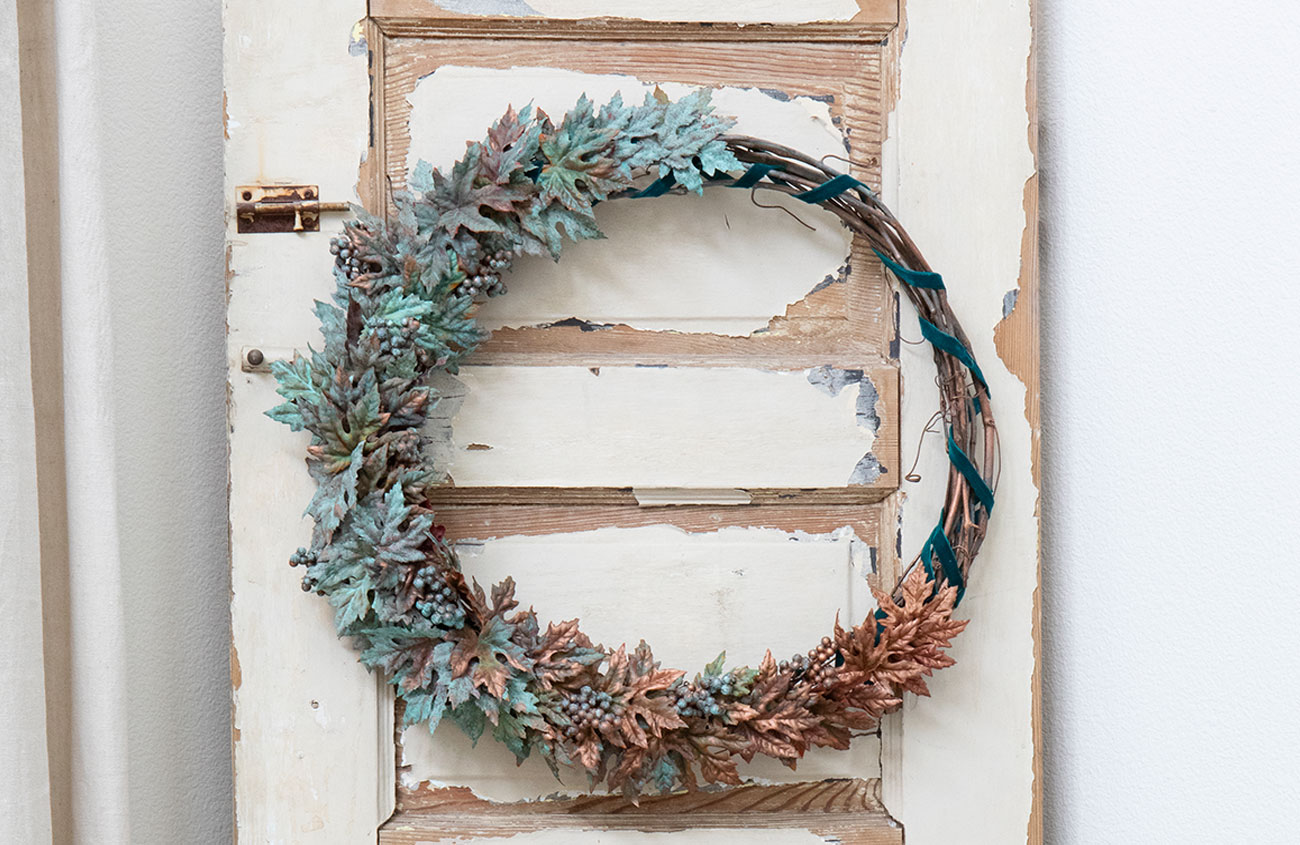
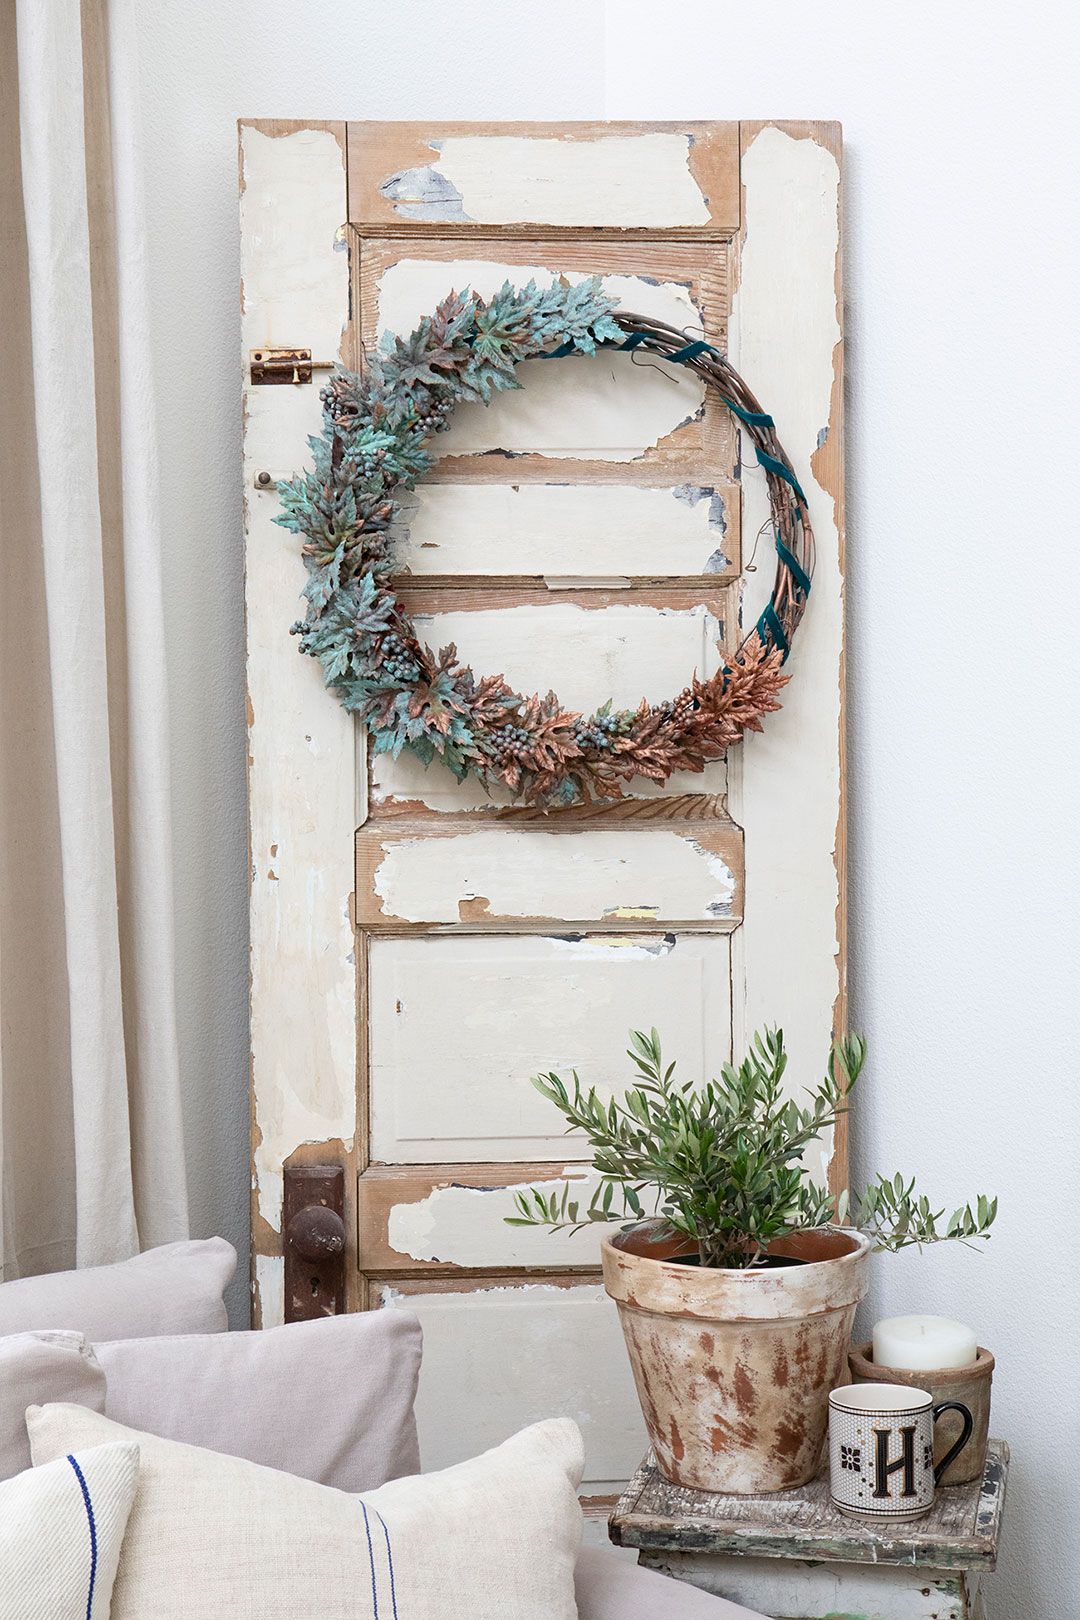
There’s magic in the air as the green leaves of spring and summer turn to vibrant shades of red, gold and copper. We’re capturing that transformative magic in this elegant and easier-than-it-looks DIY wreath that uses reactive copper paint, a patina activating agent and a little bit of patience to celebrate fall. Read on to make your own copper patina fall wreath with color changing leaves!
DIY Copper Patina Fall Wreath
(As an Amazon Associate, Cottages & Bungalows earns from qualifying purchases.)
What You’ll Need:
- Grapevine Wreath Form. Make sure to check the size of the spot you’ll be hanging your wreath before your purchase the form. You won’t want to get through the project only to discover that your wreath is too big or too small for it’s designated space! I purchased one wreath, unraveled the vines, and divided it into three new wreaths. Personally, I think the less bulky silhouette gives it a more modern look, and I’m always happy to stretch out my resources.
- Copper Patina Paint. In order to create the metallic transformation, you’ll need a product that has real copper particles and advertises itself as a reactive paint. No ordinary copper-colored craft paint will do! I used Modern Masters Reactive Metallic Copper. Dixie Belle Paint also offers a line of reactive metallic paints.
- Patina Activator. If leaves changing color is magic, then this is the potion that makes it possible! I used Metal Effects Blue Patina Aging Solution in this project.
- Faux Maple Leaves. I bought mine in an assorted pack, similar to this one.
- Faux Floral Berry Picks. Berries add variety to the texture of the overall wreath, though you could certainly add other faux floral elements for your own unique take.
- Teal Velvet Ribbon. This shade of peacock blue is a striking addition!
- Paint Brush. I recommend something with synthetic bristles, but a cheap chip brush will do in a pinch!
- Hot Glue Gun. Pro-tip: A smaller nozzle is easier to control.
- Drop Cloth. You’ll need to protect your work surface while painting all those coppery leaves.
- Waterproof Gloves. This project can get a bit messy.
- Apron or painting Clothes. See note above.
Optional:
- Salt. I used ordinary table salt to speed up the patination process. Salt also leaves a “frosted” look on the leaves when they’re dry.
What You’ll Do:
- Prepare. Spread out the drop cloth, unravel your grapevine wreath (if you’re following my route), unpack the faux florals and stir up the paint. It’s a good idea to have everything ready to go when you need it.
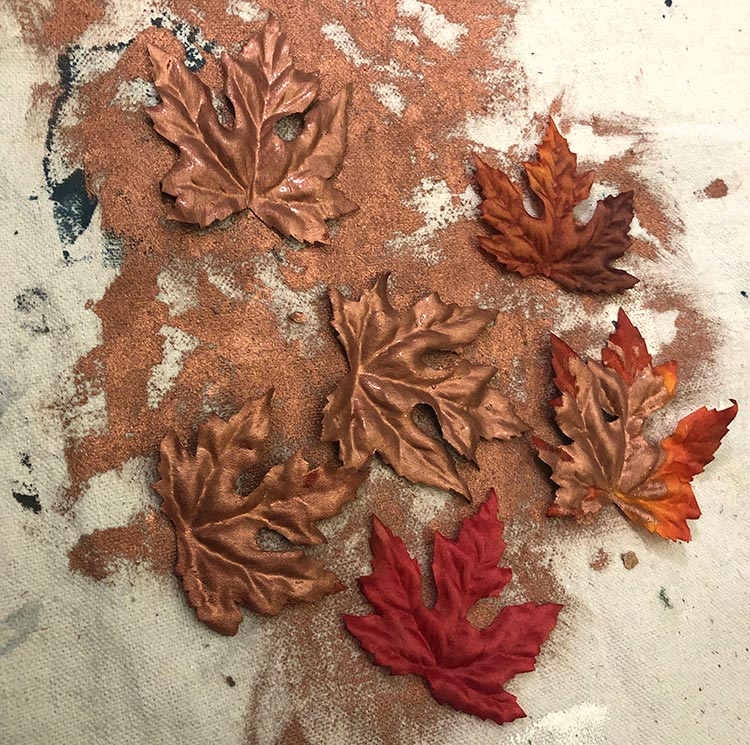
- Paint and Activate. Over your drop cloth, lightly brush the reactive copper paint on the wreath form, and spray the patina activator while the paint is still wet. Set this aside. Then, leaving some of these aside for later, spread out the faux leaves, berry bunches and any other faux floral additions across the drop cloth and proceed to paint. Spray the patina activator liberally while the paint it still wet. Sprinkling table salt at this stage can help the patina develop further.
- Wait. Here’s where that patience I mentioned earlier comes in. Verdigris, or the rich blue-green color that copper takes on after exposure, can require several years to oxidize. Patina kits cut down that time to mere hours for the same results. But, waiting is still required. I painted my leaves in the evening and waited until morning to see how the leaves turned out before I continued to assemble the wreath.
- Take Stock. After the patina has had several hours to develop, you’ll have a better idea of how each individual piece has turned out. Some leaves and berry bunches will turn completely blue, some will be spotted and others will not take to the activator at all. A lot of this project is left up to chance. If you need more blue pieces, repeat step two. If you need more copper-colored pieces, pick up those leaves and berry bunches you left aside and paint them. This time, don’t add the activator and let them dry.
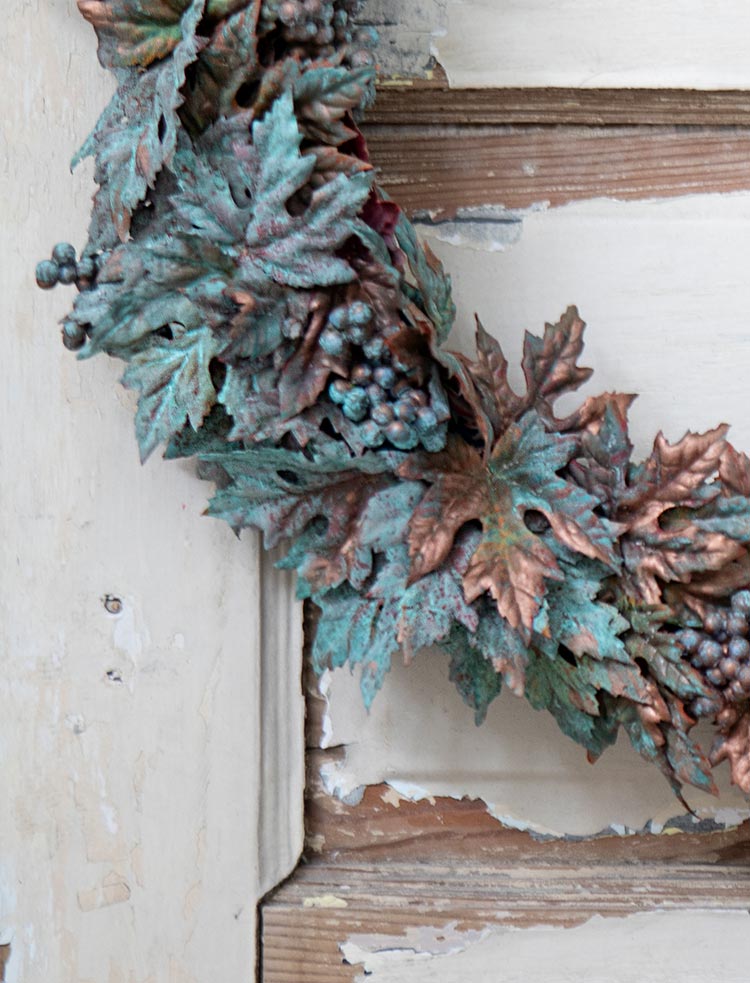
- Assemble. First, arrange your leaves and berry bunches in a green>copper gradient, so that the most patinated pieces are at one end and the purest copper pieces are at the other. Wrap your ribbon around the frame of the wreath and secure it with the hot glue gun. Then, working from one end of the gradient to the other, attach your leaves and berry bunches to the wreath form. I purposefully left a section of the wreath uncovered by leaves so the ribbon would have a chance to show off a bit. Plus, I like the look of an asymmetrical wreath.
- Admire. It’s beautiful, isn’t it? The twisting vines, the plush ribbon and the way the metallic glitter of the copper paint plays with the matte verdigris finish of the patina!
If you love DIY crafts and projects, check out DIY Cement Pumpkin Bowl and DIY Silhouette Painted Pumpkins. Of course, don’t forget to follow us on Instagram, Facebook and Pinterest to get your daily dose of cottage inspiration!